piriformis stretch to help with sciatic pain

4 Variations of the Piriformis Stretch

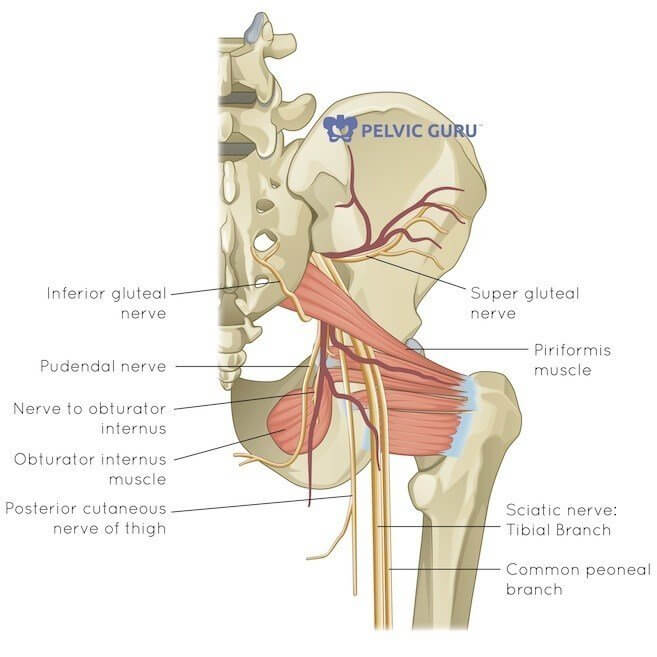
What is the Piriformis Stretch for?

The piriformis muscle is located on either side of the body, reaching from your sacrum, where your spine meets your pelvic bones, around to attach at the top of each of your femur bones. This muscle can cause pain or discomfort in your buttocks, hips, and/or pelvic floor. It can be the cause of sciatica pain for many, and it can be really irritating during pregnancy. For all of these possible causes and conditions, it’s good to have a variety of options, such as multiple variations of the Piriformis Stretch, so that anyone can find relief no matter their level of starting mobility.
Piriformis Stretch comes in many variations. It is also referred to in yoga as Pigeon Pose or Kapotasana. If you just google Kapotasana, TRUST ME that is not what I am suggesting here today. If you get me into that kind of pretzel, I’m not sure I’d get back out again, and I’m sure that’s the truth for many of you as well. I’m not looking to pretzel you, but any of the variations provided in my YouTube video , or this article, are a perfect chance for gaining increased flexibility and range of motion. You CAN do that, and I’ll show you how!

Benefits of Piriformis Stretch

  • Based on the posture you select you can also gain stretching in your hamstring, hip flexors, and/or groin muscles
  • Help with conditions associated with pelvic floor dysfunction
  • Stimulates your internal organs
  • Aids those with urinary dysfunction
  • Relieves hip and back pain
  • Great preparation of your hips for other postures that require more hip flexion (Ex: squatting or lunging)
  • Opens your deep buttock muscles
  • Many people also find this stretch aids with emotional release
If you’re just a beginner or seeking a gentle way to ease into pelvic stretching, any of these are a great starting point for your journey. Piriformis Stretch can be done by itself, or within a sequence of stretches , so start reaping those benefits today, and give it a shot! Begin by relaxing deeply, focusing on your diaphragmatic breathing, and find what you need to be supported properly in the guide below.

How to do the Piriformis Stretch

Practice your diaphragmatic breathing with this stretch 3x daily. Hold for 90 seconds at a time. This hold time is important for your body to transition and downregulate. It may feel uncomfortable at first. Meet your body where it’s at and breathe through it.

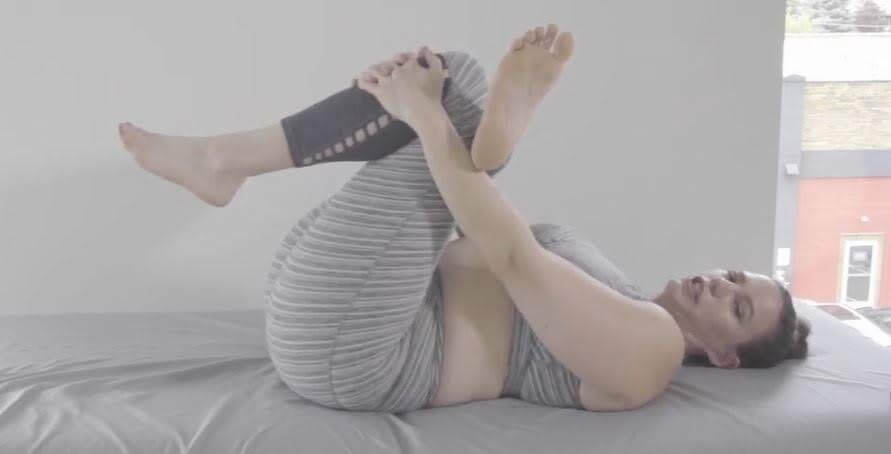
Variation 1: Supine Piriformis Stretch

Variation 1, Option 1:

This position provides some options in itself. You will see a modification that provides a deeper stretch below. For both, begin by laying on your back. Lift one leg up and rest the sole of your foot flat on the mat about 12-18 inches below your buttocks, creating a bend in your knee, rest the outside of your alternative leg, right above the ankle, on the bend in your knee. Rest in this stretch for a moment, is this enough or are you feeling good enough to take it one step further?

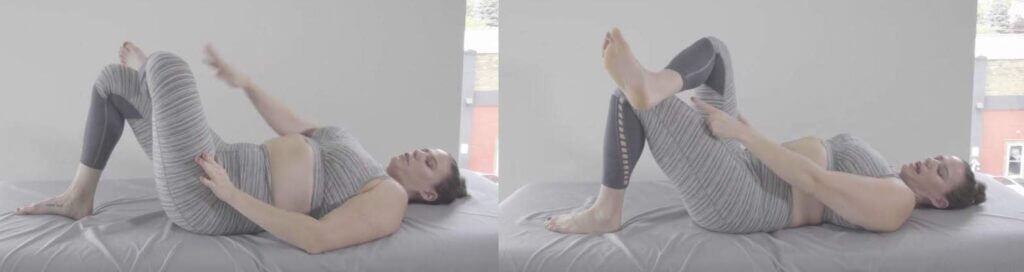
Variation 1, Option 2:

If your hip is feeling good, go ahead and scootch your foot on up, closer to your buttocks to deepen that stretch. Be sure to keep your knee from leaning forward toward your head and losing some of the benefits of this stretch. If you seem to have difficulty with that part, just scootch your foot back down an inch or so until you find a comfortable stretch.

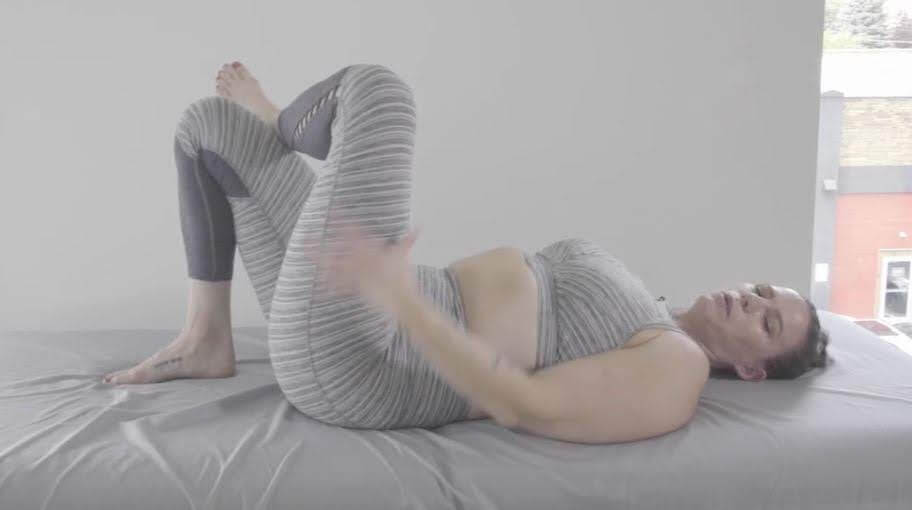
Variation 1, Option 3:

Working up through the steps? Trying to find a good starting point? Let’s move it deeper together and try it out. From the previous position, reach down to grasp the leg which has its foot on the mat or floor. Reach one hand through the hole created by your legs, and the other one the outside of the knee, hold tightly behind the knee, and pull your knee to your chest, deepening that stretch in your outer hip.

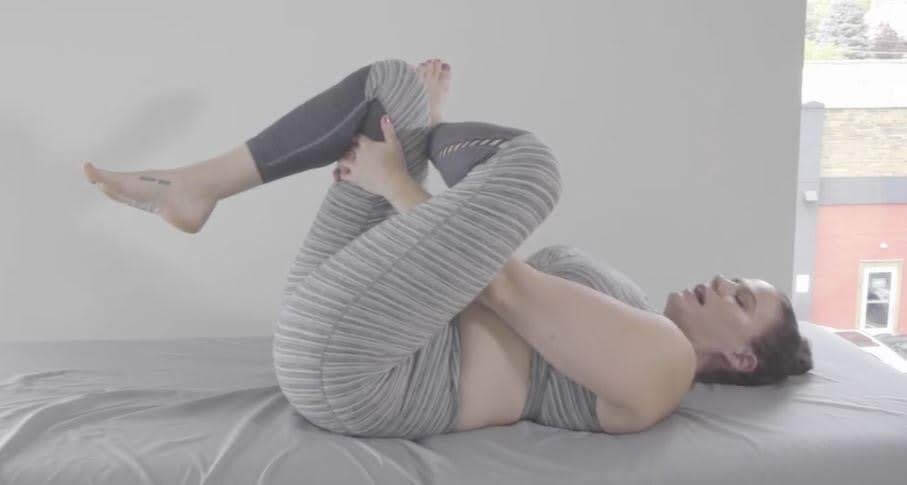
Variation 1, Option 4:

If that is feeling okay for your hands and hips, move your hands from behind your knee to the front of your kneecap. Pull your knee closer to your chest.

Other ways to deepen the Piriformis Stretch:

  • Gently rock back and forth and see how that stretch changes in your hips as you do
  • Use one hand to press forward on the knee of the leg which is crossed over to deepen the stretch through that hip
  • Struggle with short arms? Try a yoga strap or belt!

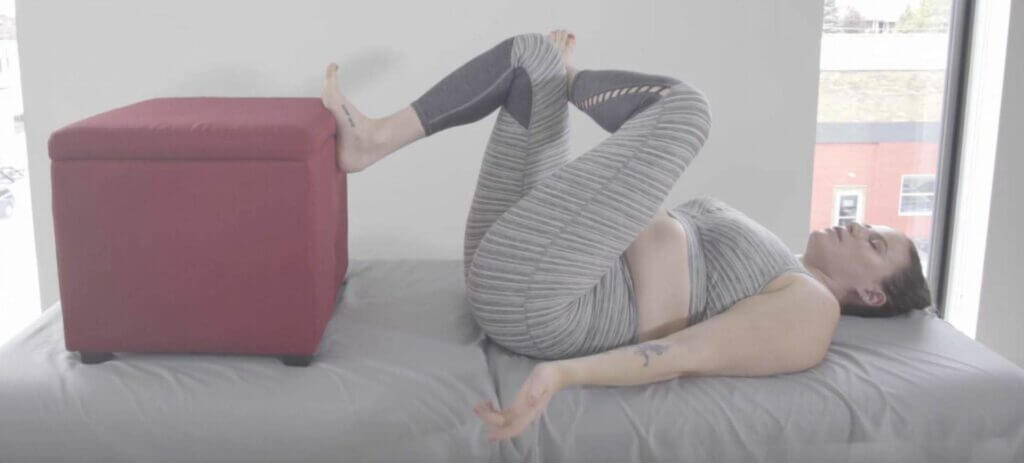
Variation 2: Supine Piriformis Stretch with wall

This variation is my personal favorite! I love it because it can feel like spa day, and allow me to bring mindfulness into my day at the same time as I pamper my pelvic floor. Benefits upon benefits upon benefits!
You can lay on the floor for this and use a wall, or even on your mattress and use your headboard, here I am using an ottoman. Don’t place your buttocks too close to the wall, this stretch can get deep surprisingly quickly. From your position on your back follow the steps in Variation 1: Option 1 & Option 2. Relax your arms and focus on your diaphragmatic breathing!

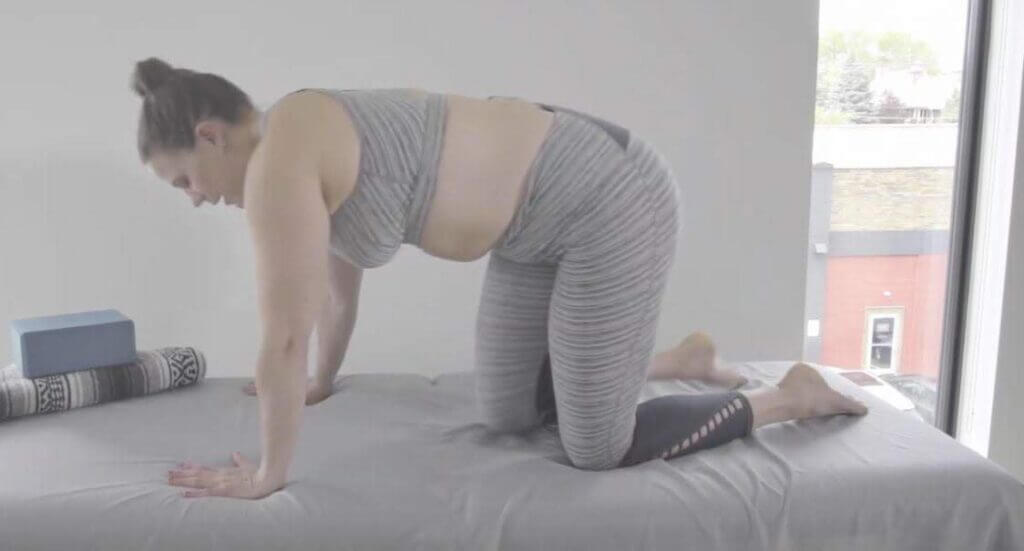
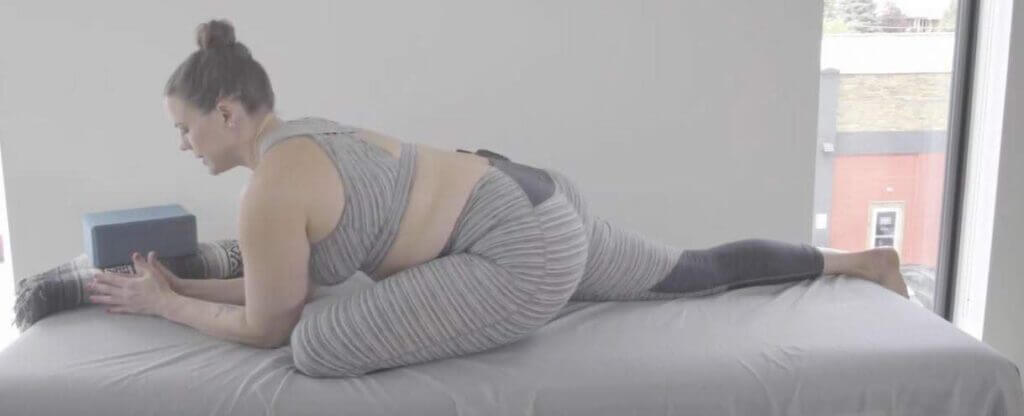
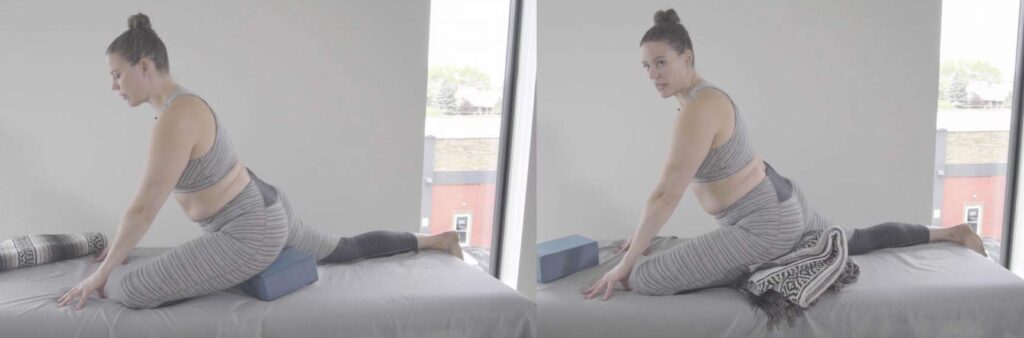
Variation 3: Prone Piriformis Stretch: Pigeon Pose

Variation 3, Step 1:

Laura on hands and knees shoulder width apart on mat in gray yoga outfit with blocks in corner

Prone Piriformis Stretch or Pigeon Pose is great for stretching through your hip flexors at the same time. Begin in this position, on all fours, hands, and knees about shoulder-width apart.

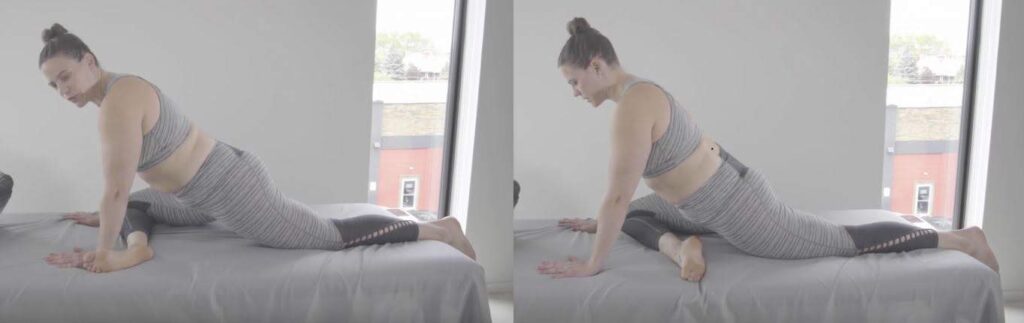
Variation 3, Step 2:

Move left knee up to meet left wrist or the same for your right side. Turn the ankle on the same side and slide it up to meet your opposite wrist, or keep it closer to your pelvic area, whatever creates the most comfortable stretch for you. For me, keeping my foot closer to my pelvic area allows me to deepen the stretch through my hip, as you can see above.

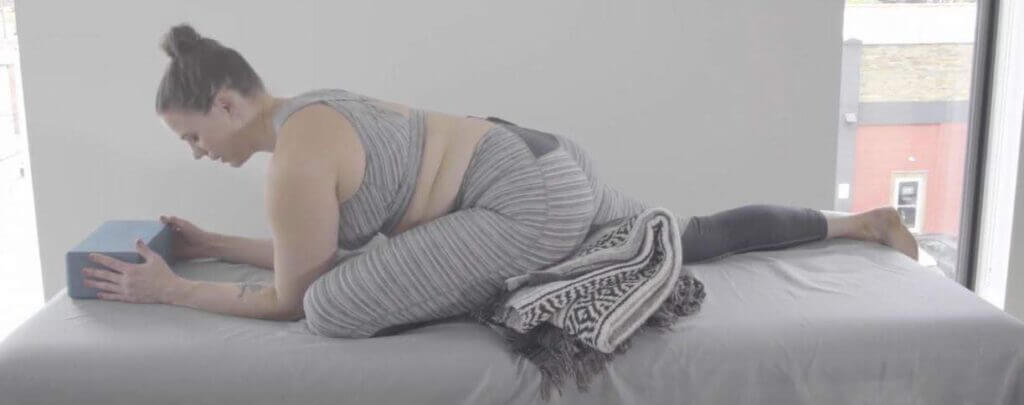
Variation 3, Option 2:

If you want to take the stretch a step deeper, lean forward on your elbows and lower your shoulders. If you feel pinching in your hip area or more than a gentle stretch through your hip, ease back up until you find a comfortable balance.

Variation 3, Option 3:

For this variation, repeat the sequence of Option 1, Step 1, then in Step 2 place a yoga block or a folded blanket underneath your buttock to raise your hip and ease that stretch a bit.
If you feel comfortable, combine Option 3 with the previous Option 2 and lean forward to deepen your stretch gently.

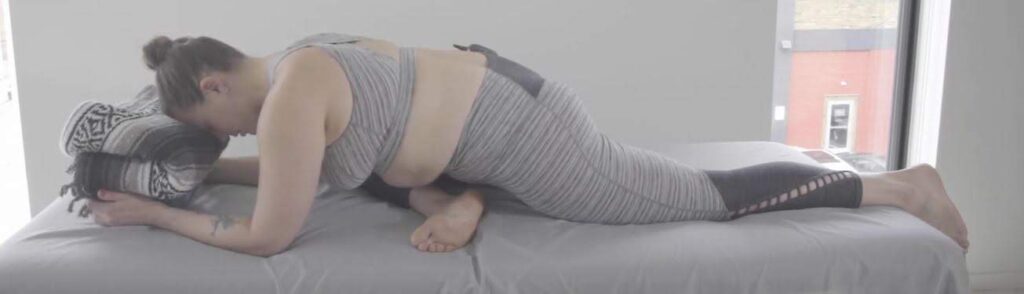
Variation 3, Option 4: Restorative

For a restorative stretch that meets your body in the middle between the above options, try incorporating some stacked yoga blocks, blankets, or both as you see above. Place these blocks underneath your forehead for additional support.

Variation 4: Seated Piriformis Stretch

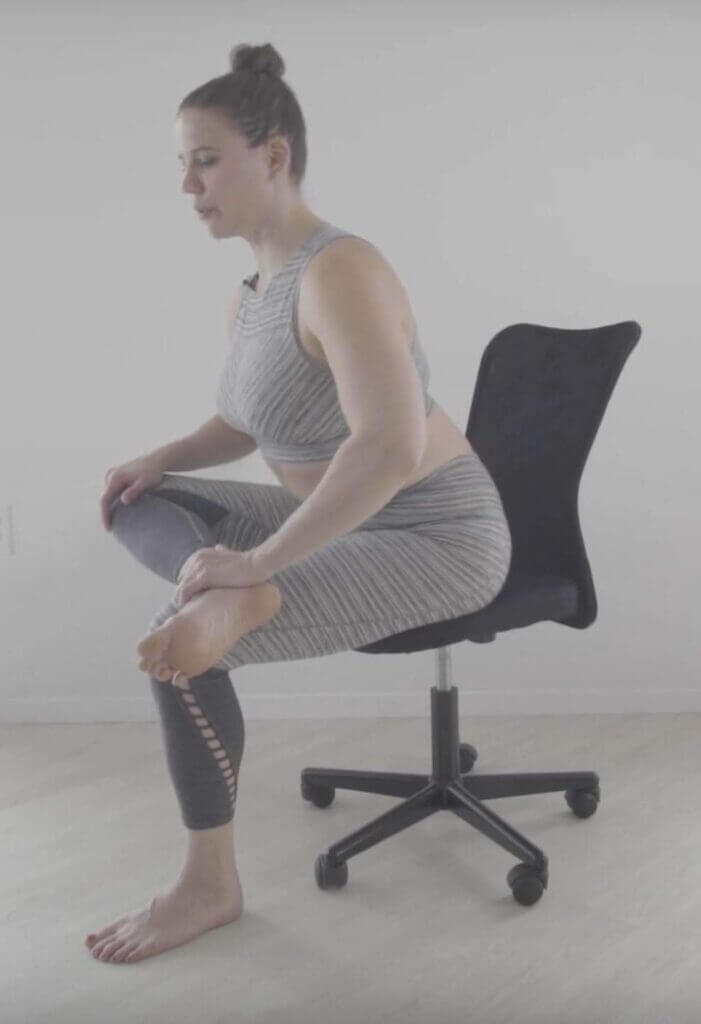
I love this option for those of you looking for a stretch you can fit into your work life! Scoot your bottom up to the edge of your seat. Placing one foot flat on the floor, turn your knee and place your alternate leg, just above the ankle, on top of your knee. Sit up tall stretching up through your chest, and begin to slowly lean forward to a comfortably deep stretch. If that feels good, begin to apply pressure through your thigh to deepen the stretch through your hip.

How to check in with yourself while doing the Piriformis Stretches:

As you work through these stretch options, check-in and ask yourself: Is it a stretch, or is it a pain? A stretch-like pulling sensation is normal, it may feel uncomfortable but investigate that feeling. A stretching sensation should gradually reduce with time and allow you to continue to deepen throughout the position.

Pain, alternately, does not change, or may even increase in intensity. If you feel pain, gently ease out of that stretch and try again utilizing a different variation. There are lots of ones to choose from

For a full range of poses and stretches, with a multitude of modifications, check out the following resources! Use these to design an individualized, daily plan to build healthy movement into your life!

Follow And Stay Connected

No Comments

Post A Comment