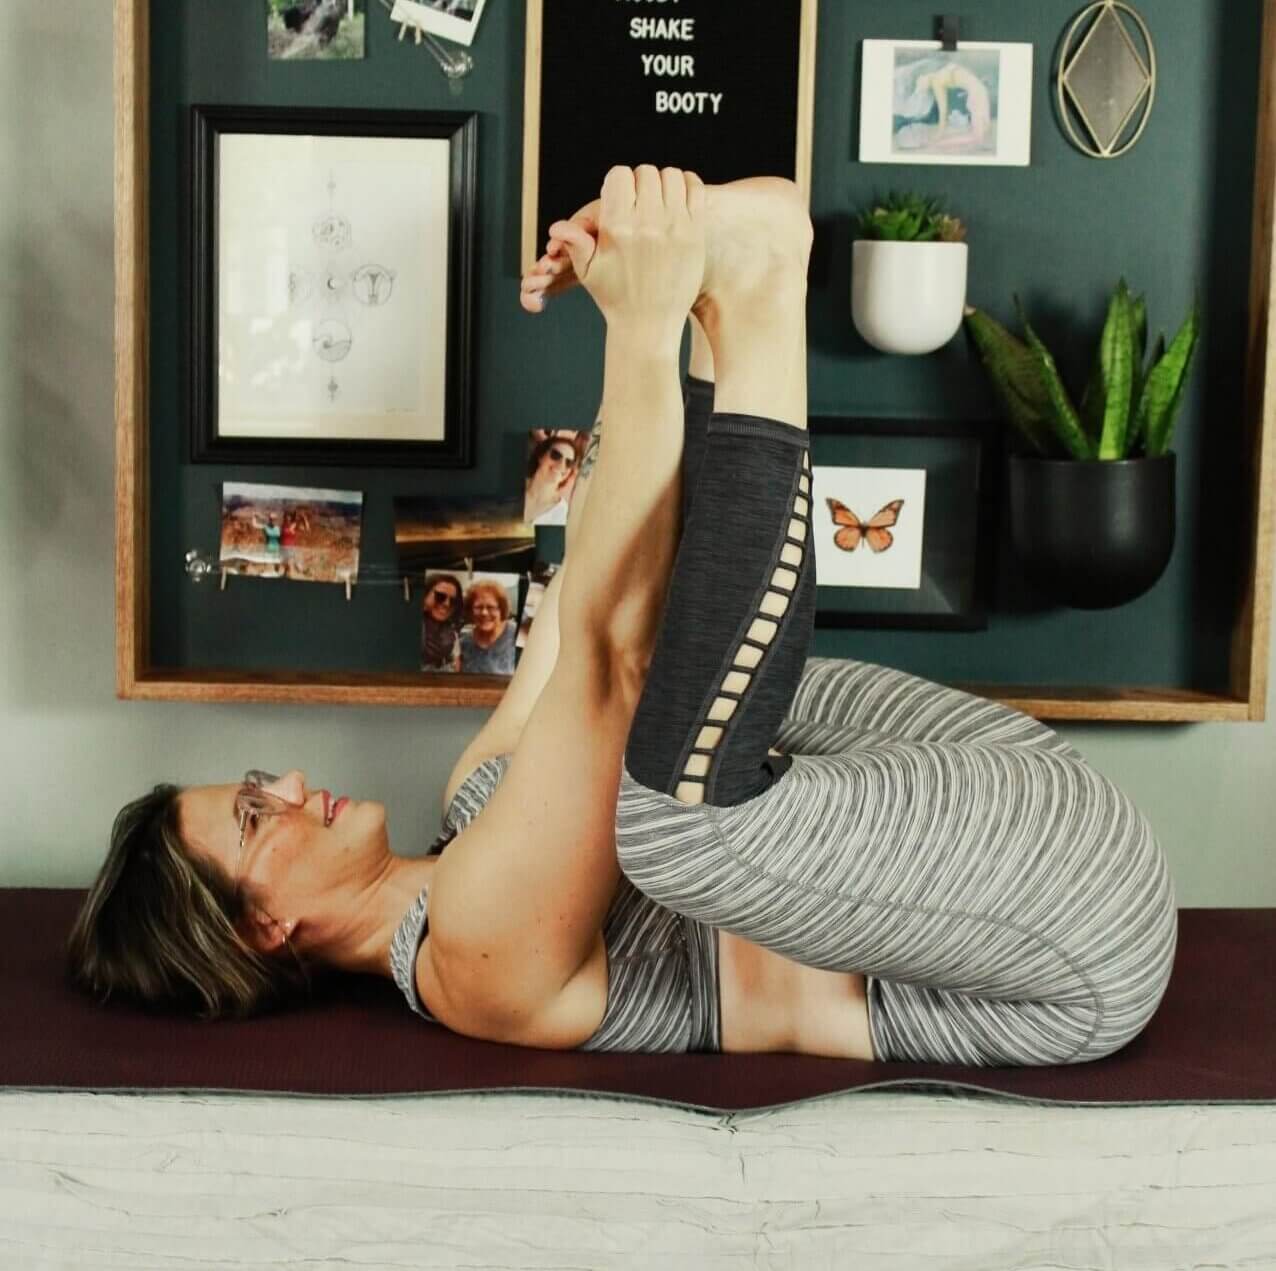
Happy Baby Pose, or Ananda Balasana, is a very effective hip-opening yoga pose. It is wonderfully playful while providing plenty of benefits to your knees, hips, hamstrings, calves, and lower back. Happy Baby Pose is a position that can be utilized on its own, or within a sequence of yoga poses.
Happy Baby can even be used as a resting pose complete with a spa facial mask! If you would like more information about specific yoga routines, please visit my information page. Begin by relaxing deeply, focusing on your diaphragmatic breathing, and find what you need to be supported properly in the guide below.
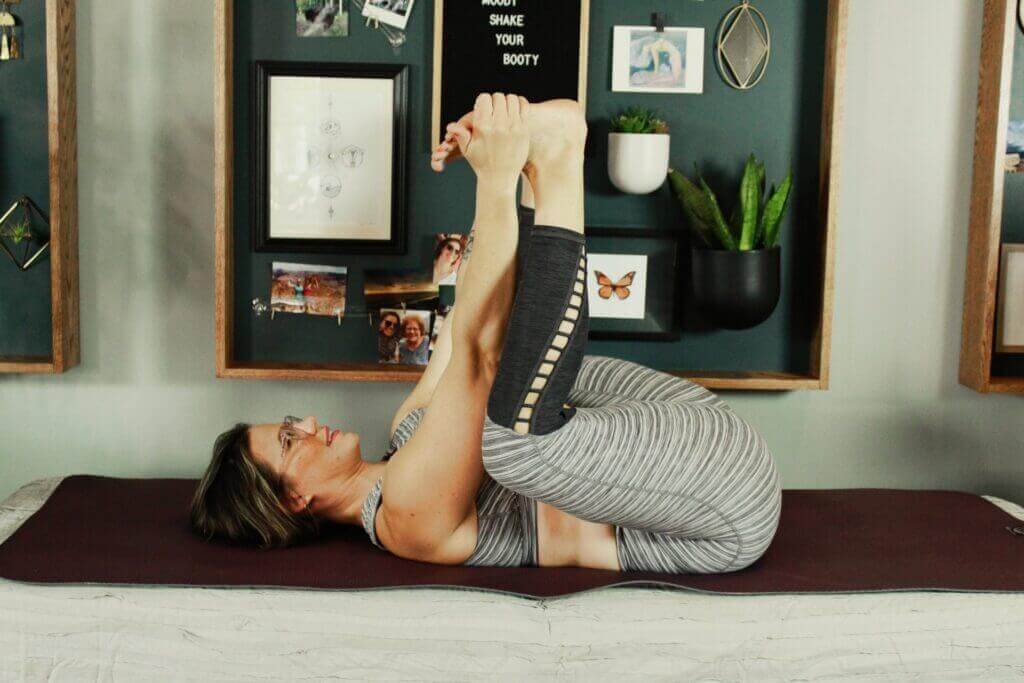
As you can see, the happy baby pose may be difficult for you, and many others, to get into. Yoga poses are not a one-size-fits-all, and everyone has a unique body and level of comfort.
In this article, I walk you through the process of getting into the happy baby pose, as well as in the partner video through my YouTube channel, and offer variations to help you adjust this position to meet your needs. If you are looking for a different type of modification or have questions, please contact me, I’d love to hear from you!
BENEFITS OF THE HAPPY BABY POSE:
- Decrease pain in the pelvic region, abdomen, back, hips, and groin
- Help with conditions associated with pelvic floor dysfunction
- Help combat fatigue and depression
- Gain opening in the knees, hips, hamstrings, and calves
- Massages and lengthens the spine
EXERCISE!
Practice your diaphragmatic breathing with this posture 3x daily. Hold for 90 seconds at a time. This hold time is important for your body to transition and down-regulate. It may feel uncomfortable at first. Meet your body where it’s at and breathe through it.
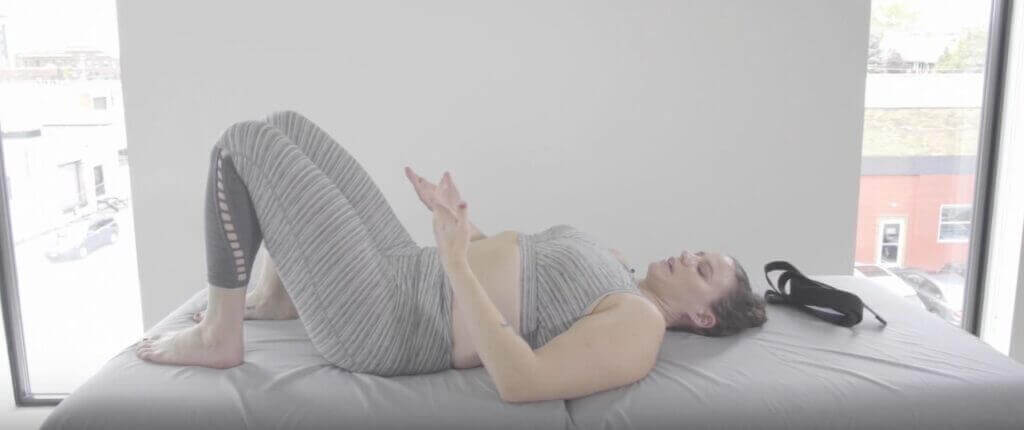
HAPPY BABY POSE: STEP 1
Begin by lying face-up on the floor, a mat, yoga table, or any flat surface. Raise your knees and pull your feet closer to your buttocks, and rest the bottom of your feet on your flat surface.

HAPPY BABY POSE: STEP 2
Reach your hands down between your knees, and bring your ankles up to meet them. Grab your ankles or around the sides of your feet, wherever is comfortable, and pull your ankles up into a butterfly stretch. Feel free to rest and stretch here to prep your body for the final step.
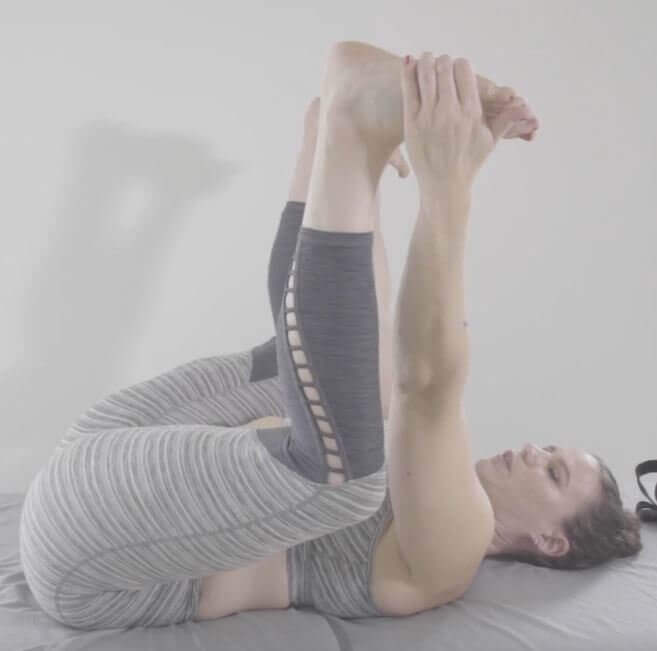
HAPPY BABY POSE: STEP 3
From this position, move your hands to the outside of your feet if you are not already holding there. Gently pull your feet outward, opening up your pelvic region. Relax through your shoulders and neck, focus on your diaphragmatic breathing. You should feel some pulling in the back area, or hamstring, of your leg.
There are many ways to explore this position. Many people like to gently rock left and right when in this position. I personally give preference to one of my hips on certain days and let that one sit a little higher in the bend than the other side that day.
HAPPY BABY POSE: MODIFICATION 1
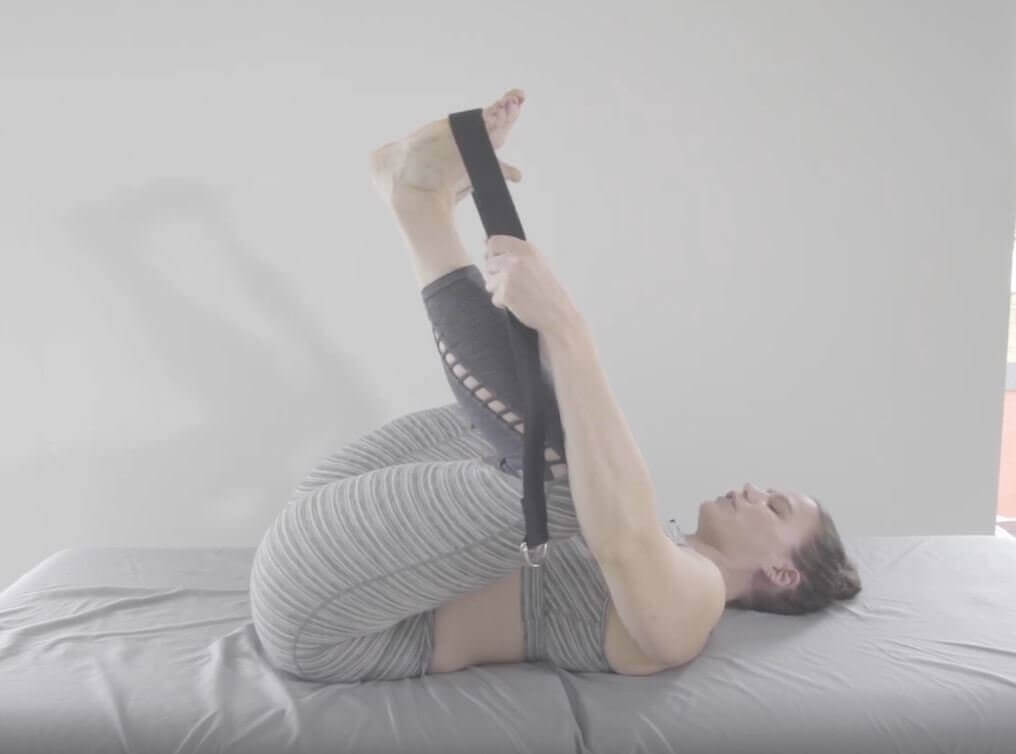
This modification is a great way to introduce this posture to your routine without straining any part of your body. It can also be very useful for anyone who struggles with the range of motion in their hips, knees, or ankles. Utilize a yoga strap, belt, or even a rope tie! Any kind of flexible, yet firm band that you are comfortable holding onto will work.
From Step 1, place the strap in your hands and hold firmly. Reach down and bring your feet up to meet, resting the balls of your feet against the strap. Use your hands to pull up on the strap and deepen the stretch, pulling your knees towards your armpits.
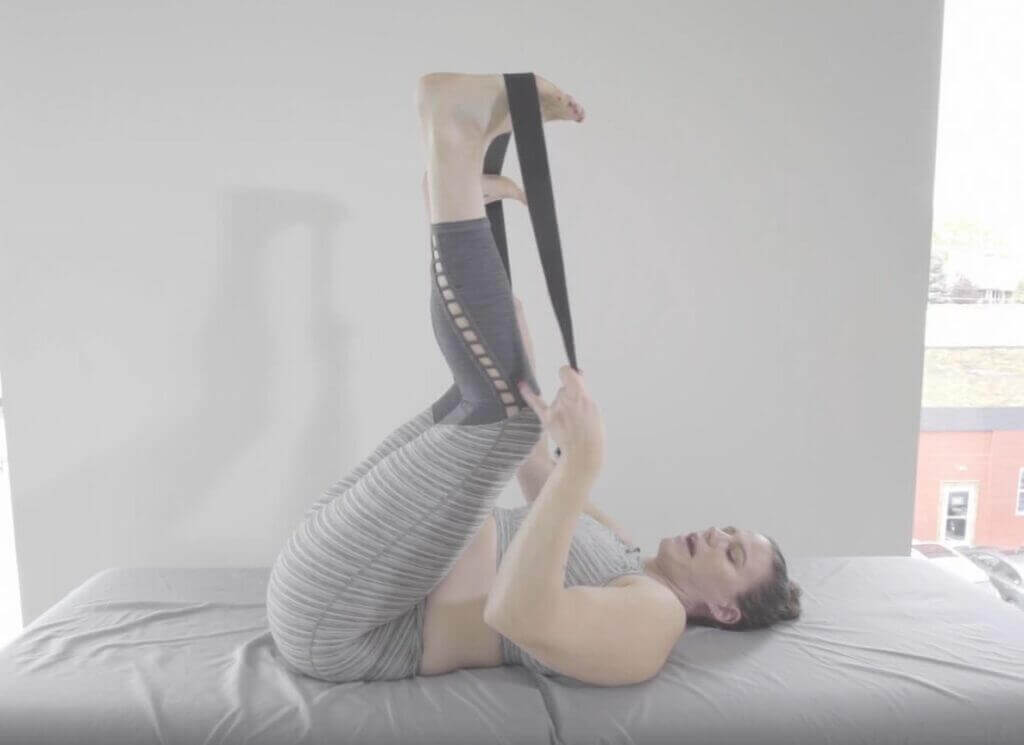
NOTE: Your Happy Baby Pose might look more like this at the beginning, that is okay! A lot of people start their journey here. You still have the bend in the knee and hips, and you can relax and breathe through the stretch comfortably. Practice your diaphragmatic breathing and each day work to deepen that stretch and meet your body where it is at.

HAPPY BABY POSE: MODIFICATION 2
Another very helpful variation can be to perform the position one leg at a time. Both legs at once cause a flexion moment in your pelvic region, which can be helpful certainly, but you never want to push your body too far. If that feels at all uncomfortable begin with one leg at a time. This modification to the position helps to neutralize your pelvis.
Place one leg on the floor or surface laying flat and extending out along the surface. Your alternate leg will be the one performing the stretch. Keeping your elbow inside of your knee, grab the outer edge of this foot and gently straighten and stretch through that knee, pulling your foot out and sinking that knee towards your armpit to a comfortable level.
HAPPY BABY POSE: MODIFICATION 3
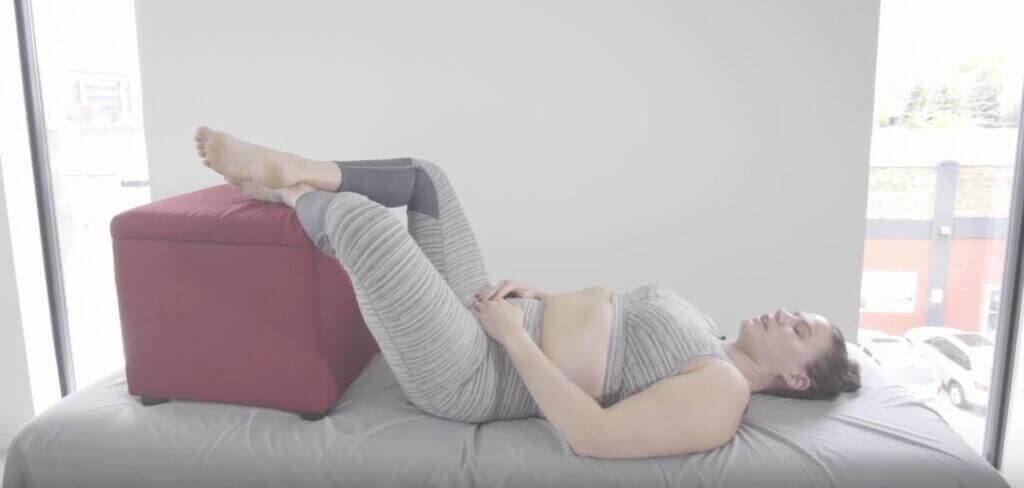
This modification is great for those seeking to utilize Happy Baby in a restorative way, placing very little stress on your ankles, knees, hips, and pelvic floor. It also can be very helpful for anyone who struggles with the pulling motion on their feet or a yoga strap. You will want to utilize an ottoman or a stack of pillows, something that has some height and durability to be able to support the weight of your legs without affecting your pose.
Begin by laying on your back on the floor, or surface, with your ottoman below your hips. Place both of your feet on top of the ottoman. Cross your feet at the ankles and slide your ankles slightly closer towards you, allowing your knees to gently fall open to the sides.
This is a restorative modification for this position, so you should be relaxed! If you are not, focus on your body and your breathing, relax your knees, back, neck, and shoulders, and check again.
I also encourage many of my patients to spend some time in this position. Grab a blanket and an eye mask, put on some calming music or ocean wave sounds to help bring your more comfort. Gaining comfortability moving your body in these ways is an important first step for many people!
For a full range of poses and stretches, with a multitude of modifications, check out the following resources! Use these to design an individualized, daily plan to build healthy movement into your life!
If you have any questions about yoga poses such as happy baby pose, or anything pelvic floor health-related, you can book a FREE 20-minute consultation HERE.
Or, if you’d like to learn more about all things pelvic floor health, head over to Instagram! You can always reach out in the DM’s if you have any questions!
More content you may like:
New to the Pelvic Floor – Start Here
Interval Timer App that I Use (Apple Store)
Relaxed Diaphragmatic Breathing for Your Pelvic Floor
Recommended Products
I LOVE the yoga store Manduka for their quality, and variety of options, designed to meet all of your needs. Manduka is a great one-stop shop for high-quality yoga products. They also sell clothing and other accessories to make those pelvic stretches possible for everyone.
Link: Manduka
DISCLOSURE: Hi there! – I truly hope you love any product I recommend, I always try them out personally or with my patients. At times, I use affiliate links. You do not pay more, a small percentage of the sale goes to the person who has influenced your purchase. This helps me to continue offering free content. Let me know your experience! All pricing is up to date at the time of posting.




Sorry, the comment form is closed at this time.